Skip to content
A newly painted fence can breathe new life into your property and protect your outdoor space from the weather. Whether you are painting an old fence or starting fresh, here are some tips to make it turn out right. If you want professional assistance, Sydney Shine Painting provides excellent paint services.
SUPPLIES AND TOOLS DO YOU NEED TO PAINT A FENCE?
Make sure to gather these supplies before you start your fence project:
- A small roller
- Primer
- Sandpaper
- Paint tray
- An extension rod for the roller
- Stiff brush
- Fence paint brush
- Fence paint sprayer
- Bucket
- Sponge
- Dust sheets
- White spirit
- Gloves
- Safety goggles
- Dust mask

Making a list of everything you’ll need and having it all ready before you start painting will save you a ton of time. When working on a project like this, it might be easy to lose speed if you have to stop and go back to the store to get something you forgot. For a hassle-free experience, consider hiring Sydney Shine Painting.
THE BEST PAINT TO USE FOR FENCE Painting?
It’s important that you select an excellent exterior acrylic latex paint. Now is the perfect time to invest in paint that will resist the weather and offer durable coverage. We used Exterior Acrylic Latex Paint. I can’t say enough good things about it. It covers a great deal and moves along smoothly. We used two coats of Extra White on this project.
Extra White is a real white with a crisp, clear hue. It translates nicely to fences, mouldings, and other outdoor surfaces, making it a good choice for outdoor settings.
Safety first
Sydney Shine Painting focuses on safety, Wear safety goggles when painting, gloves when sanding, and a dust mask when sanding. When using a step ladder, placing it on level ground and wearing the proper shoes is important. If fence paint gets on your skin or eyes, wipe it off immediately with water.
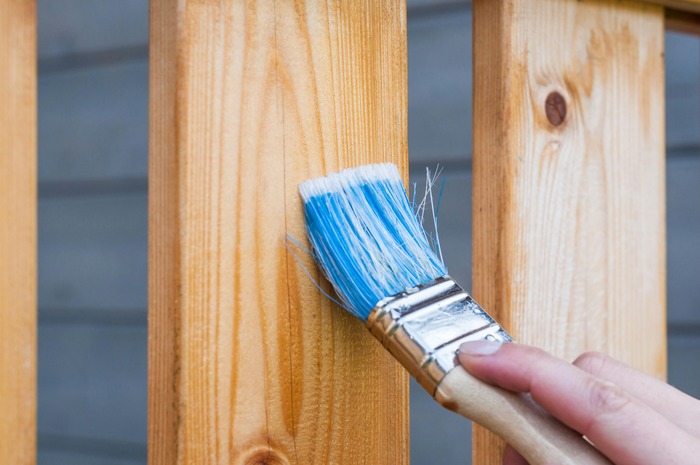
Fence Painting with a Brush
Paint brushes are perfect for fine details or those difficult-to-reach places on the fence that a roller can’t reach.
1. Paint any edges, corners, or difficult-to-reach places close to walls, furniture, or plants using a 2″ paintbrush or a smaller 1″ brush.
2. Start with a single, even layer and let it dry completely before adding a second.
3. When the painting is done, wash your paintbrushes in warm, soapy water to remove extra paint. Because exterior wood paints are oil-based, you might need to soak them in white spirits after cleaning.
FENCE PAINTING with a Roller.
Get yourself a paint roller if you’re seeking quick fence painting ideas. Rollers can cover larger areas faster than brushes can. For optimal outcomes, adhere to the following steps:
1. To paint bigger areas, use a regular roller with a medium pile. These rollers apply paint evenly and take up paint quite well.
2. Work your way down, using vertical strokes for vertical planks and horizontal strokes for horizontal planks of wood. Following the direction of the wood guarantees a faster application process and a better finish.
3. Apply a second coat and follow the previous instructions once the first coat has dried. This will improve wood preservation, give your fence paint colors depth, and offer a long-lasting finish.


1. Choose the right fence paint
Good quality fence paint adds a new shade and style to your fence and, at the same time, offers protection against elements for long periods. In your choice of paints, Sydney Shine Painting choose the kind that regards the type of wood your fence is constructed of and also the type of climate in which you live. When choosing its paint, it is important to consider the type of wood your fence is constructed from and the climate you live in.
We suggest using a paint specially developed for outdoor use and suitable for wood, which will be durable, dirt-repellent and gives many years of service, staying clean under different weather conditions. In addition, which will be environmentally friendlier, under the effect of these paint properties, mould cannot grow on the painted surfaces; this frequently happens with wooden fences.
Also, consider the level of sheen you want for your fence paint. A glossy and reflective finish with a vibrant, shiny finish is easy to clean, but it may not be what you desire if you are after a natural-looking finish. A matte and satin finish is more naturalistic and subtle in its appearance, making it more applicable for wooden fences that work their way into the landscape.
2. Choose a colour that matches your facade
Even though it is quite challenging, painting your fence the same colours as the exterior of your home will make the house blend uniformly together. During the colour selection process for your fence, remember that it may affect the impression that others have of your property when looking at it, especially something that’s in front of your home. This may be relevant, for instance, when selling real estate.
Consider your home’s exterior style and colour scheme when selecting a colour. If you are feeling adventurous, go for a matching or contrasting colour instead of trying to match the primary colour of your house with the colour of your fence. Testing a colour before using paint on your entire fence is usually a good idea. This can be accomplished by lightly painting a tiny section of the fence or a wooden board and observing how the paint appears under various lighting conditions.
4. Protect any plants or furniture nearby
Cover any flowers, plants, and patio furniture close to your fence with a tarp to protect them from paint drips. This will maintain the greatest possible appearance of your garden during and after your painting endeavour.
5. Impregnate new or untreated surfaces
We advise coating the surface before painting a new fence. This will extend the wood’s life and safeguard it by rendering it resistant to contaminants, weathering, and moisture. If you impregnate it before painting, your fence will look fantastic for years to come.
6. Use a paintbrush for more control
You will have more control and be able to reach narrow spaces with a paintbrush. Select a larger brush for the fence’s major sections and a smaller brush for the regions that are difficult to reach.
7. Apply more than one coat
A second coat is typically required for complete coverage, depending on your fence’s condition and the type of paint you’re using. This is especially true if you’re altering the colour of your fence paint. Use a primer prior to applying the top coat. Before adding the next coat, let the previous one completely dry. Don’t be scared away from applying a few extra coats for protection.
Painting a fence is a great way to add colour and character to your exterior space. Aesthetically appealing and durable, everything that can make a person exclaim wow can be brought about with the right preparation and paint. Have some fun with your paintings. For professional assistance, contact us.